 |
| Friar's Hat (or Bishop's Crown) chilli |
150g Friar's Hat Chillies
1 large red pepper
1 kg of Jam Sugar
600ml of cider vinegar
The plan is to dissolve the sugar in the cider vinegar over a low heat (without stirring apparently), Meanwhile, blitz the pepper and chillies in a food processor until nice small chunks. The original recipe called for deseeding the chillies first but that seemed like a waste so I left them in.
 |
| The blitzed chillies and pepper |
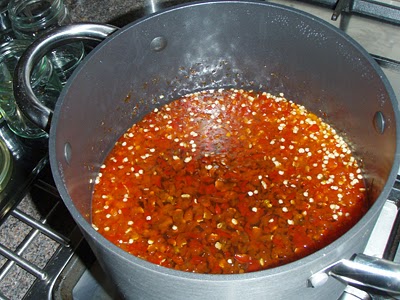 |
| The syrupy mixture after boiling. |
Couple of important notes at this stage. Firstly, you need to boil without the saucepan lid on. I know this would seem obvious to seasoned jam makers but to a novice like me it wasn't immediately clear. Secondly, you really do need to have the jam going on a good boil and even then, ten minutes might not be long enough.
As it was, my original batch didn't set when cool so I poured it back into the pan, re-boiled it for longer and this time it set.
 |
| Save any old jam jars you can, they'll come in handy |
 |
| All I now need do is think of a name for this concoction. |
As for news on the growing front, well with the addition of a new (and even bigger) growing light, the seedlings are doing well. The LED light didn't cover a large enough area for the number of plants I've got so with a hastily rigged light box (thanks to Bacofoil) my new CFL light is keeping the little plants very happy, with many, particularly the Loco and Tabasco seedlings shooting away.
 |
| The new CFL unit |


No comments:
Post a Comment